New DT at Vilda Stamps...

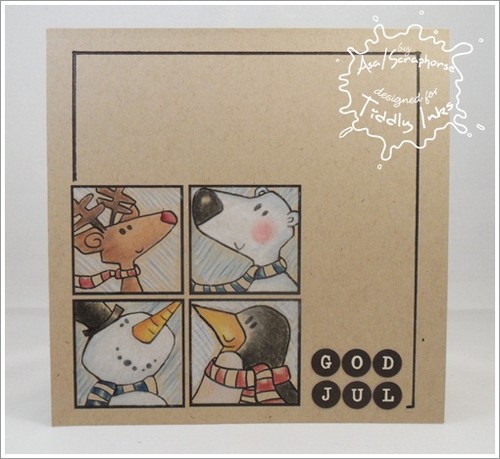
Fabulouse Friday at Tiddly Inks...
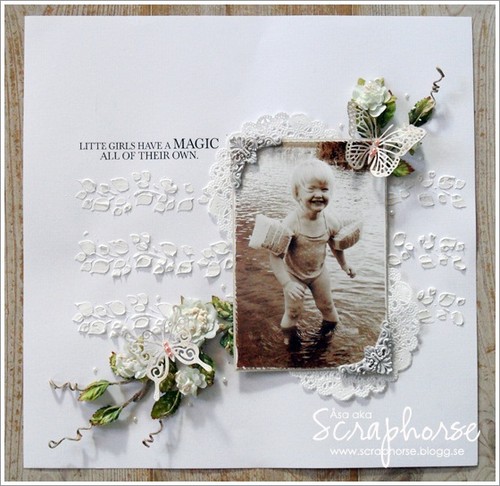
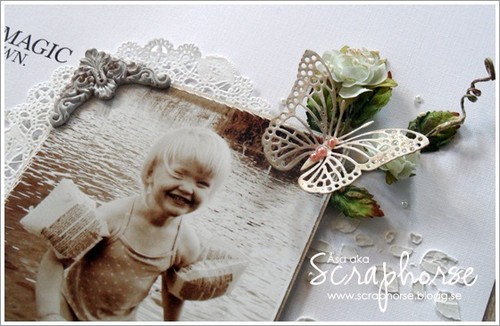
Project feature at Some Odd Girl...
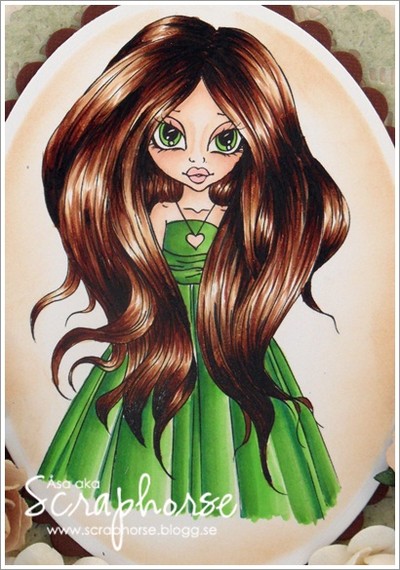
Hi there lovely Oddies! Today Im showing some Project Feature in the SOG Blog.
I really like to buy lots of Chipboard minialbums, rip them apart and make special cards of them instead.

Here I´ve used a round album, with a frontside with a shape of a star.
The image is colored with Distress Markers.
Then I lined it with paper, some decorations and wonderful Angel Gwen.
I´s a really easy way of doing your card a little bit extra special!
Have fun crafting!
Artificiell snö hos Scrap-Perra...
Idag tänkte jag fokusera på en specifik produkt, nämligen DecoArts Snow-Tex, hos Scrap-Perra.
Det finns en massa olika produkter som ska efterlikna snö,
men det speciella med den här är att den även ger strukturen av snö.

Att en sådan här produkt blir häftig som snö på ett färglagt motiv är nog inget som undgår någon.
Men jag tänkte fokusera på att använda den i ett annat syfte. Nämligen att använda den som en vanlig akrylfärg eller liknande.
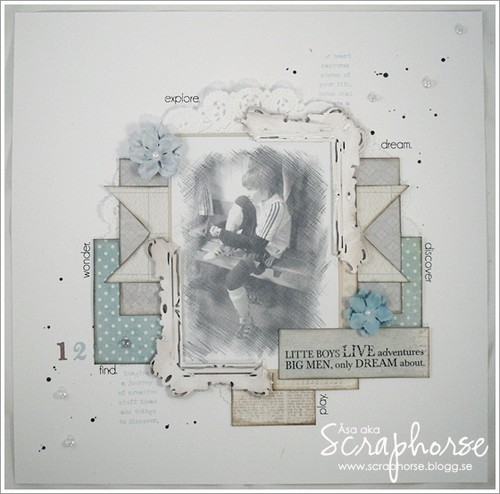
Jag börjar med en layout:

Jag har använt papper från Authentique´s Peaceful.
En helt underbar pappers serie, där det riktigt tar emot att klippa i det första pappret.
Jag har använt Chill som bas och sedan småbitar av Cozy, tillsammans med doileys, wellpapp och spets.

Här en närbild på Snow-Tex effekten.
Den är nästan lite småkornig, och ger lite känslan av spackel/murbruk.

Här en närbild på ett mönster gjort med hjälp av en mask och Gesso.
Layouten är dekorerad med Prima blommor, Ingvild Bolmes underbara Shabby Chic kollektion och halvpärlor.
Jag har även gjort ett kort av samma Authentiques papper:

Här har jag använt Cozy och Freeze.
Jag har använt olika dies från Spellbinders för de olika formerna.
Textstämpeln är från Tim Holtz.
Kanterna är distressade med Tea Dye och Walnut Stain.

En närbild på de härliga Prima blommorna.
Här har jag haft Snow-Tex på blommorna, löven samt runt kanten till texten.
Hoppas Ni fått lite inspiration att pröva Snow-Tex eller liknande produkter.
Facebook Fun Day with Some Odd Girl...
Hello there Oddies! Are you having fun at Facebook Fun Day?!
It´s Åsa here and Im going to show you a Gate Fold Window Card, hoping to inspire you to show us some fun Card Folding!
Here is what you need:

Some cardstock, designer paper, an amazing odd image (I used the polar bear from Winter Friends on this card) and a die or shape of your choice.

The gate fold it self is a very easy card fold.
Cut your cardstock in your regular size, 6"x12", and then fold it at 3" and 9".>

Then I cut out my image with the same shape I want to use to do the window.

At the next step I put the die/shape on the inside on the card, at the same place that I want my picture later.
It´s important that you put the cutting part upwards!
I use tape to be sure it don´t move when I run it through my Big Shot.

Then I fold over the flaps over the die....

...and finally put the DP on the top (my size 6"x6").
Then when I run it through my Big Shot I will get the same cut/shape at all the papers at the same time.

This is how it looks when I´ve cut it all out.
Now it´s only the fun part left - to put everything together and decorate the card:

The front of the card.

And this is how it looks when the card is open.
I hope you followed me all the way to the end of the post, now Im so looking forward to seeing your amazing creations. We have a day full of fun projects and giveaways. Make sure you don´t miss all the fun!! You have thru tomorrow (sept 23) at midnight EST to link up your projects for this challenge below. The winner of this challenge will get 3 Digis of their choice from the shop!
Hugs, Åsa
StampARTic goes Meljen Design...
This time we have been sponsored by the wonderful Meljen's Design at StampARTic.

She is designing cute and sweet stamps, both digi and rubber.
Here is one of my cards:
Papers are from Melissa Francess.
So simple that I even didn´t use distress or anything!
Hmmm, can I maybee have a fever!??
But I like how it turned out, even without the distressing and decorations.
Sometimes less is more!

Sorry the pictures went a little dark.
But isn´t she just too cute!?
Have a lovely wekeend!
Getting Inky with Critters...
We are back...
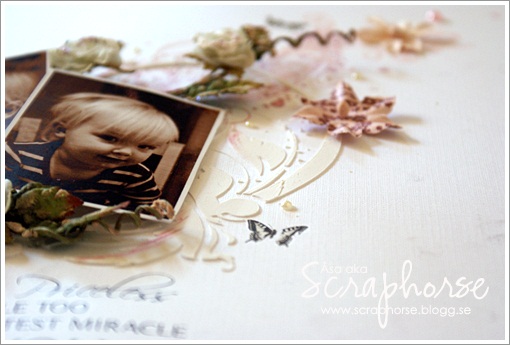
Romantiskt layout för Scrap-Perra...
Först vill jag passa på att tacka för en underbar pysselhelg i Enköping.
Det var lika roligt som vanligt, och jag är fortfarande lika imponerad av Perra och Mia som orkar släpa med sig hela butiken varje gång.
Inte bra för plånboken, men så-å mycket roligare att pyssla!
Ja, trots den kortmakare som jag är, så verkar jag för stunden fastnat i layout-träsket. :0)
Jag hoppas Ni har överseende med detta, det kommer snart kort i bloggen igen.
Här kommer en layout som jag faktiskt gjorde till en av tävlingarna på träffen i helgen och som jag visar hos Scrap-Perra idag:
Jag fortsätter på mitt softa, lite romantiska tema som tidigare.
Och jag fortsätter leka med Modeling Paste, masker och att försöka skapa dimensioner utan en massa papper och lager på lager.

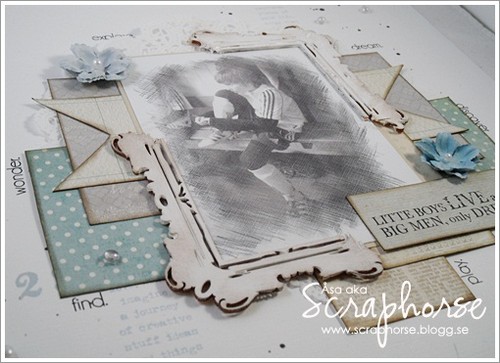
Här ser ni en närbild på mönstret jag skapat med hjälp av masken och strukturpastan.
Jag har också använt mig av de härliga Prima blomsterna på stjälk.
Jag har dock valt att klippa sönder de i lite mindre storlekar och sedan gömt dem lite under kortet.
Sedan har jag spridit ut lite halvpärlor här och där i samma linje som blommorna.
Här ser Ni den andra delen av blomman sticka upp.
Fjärilarna är ustansade, och sedan har målat dem med Glimmer Glam för att få dem att hårdna lite.
Samtidigt som det glittrar så fint.

Under bilden har jag också använt Doilys för att få lite mer liv i bakgrunden.
På hörnen har jag använt Primas fina Shabby Chic dekorationer.
Som rubrik har jag använt en av Kaiserkrafts Rub Ons.
Och tro det eller ej, men jag vann faktiskt tävlingen med denna!
Smått chockad, och otroligt tacksam!!
Ha det så gott, så ses vi snart igen!
European Copic Coloring Program....
Blir några långa resor innan det är klart, men det ska bli jättespännande!
Hoppas det finns intresse ute i Pyssel-Sverige för att lära sig lite färgläggning... ;0)
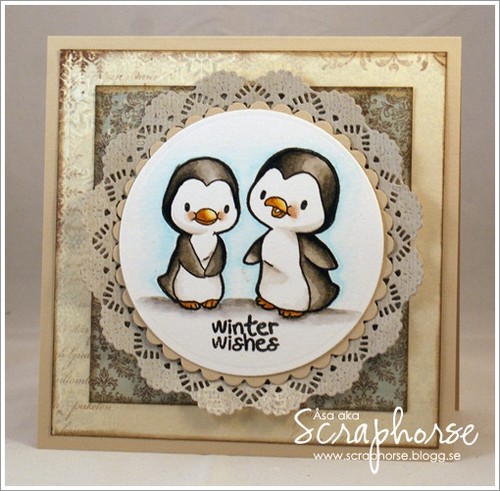
New challenge over at Sweet Stamping Pixies...
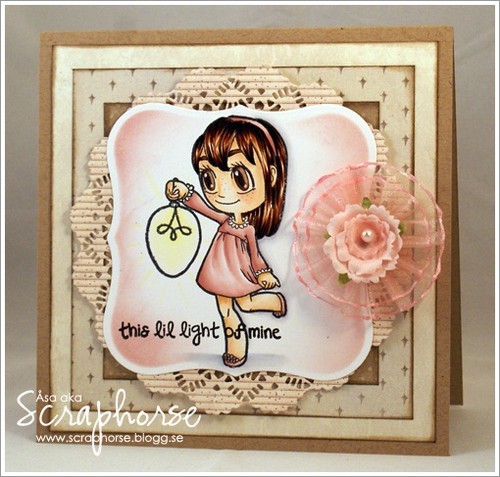
The image is colored with Distress Markers.
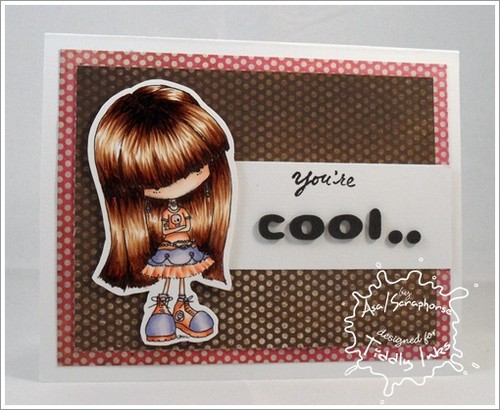
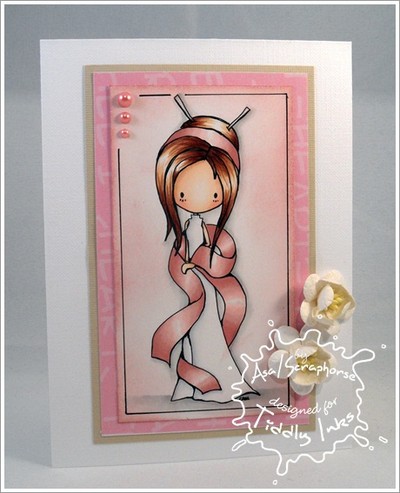
Another outfit in the closet...
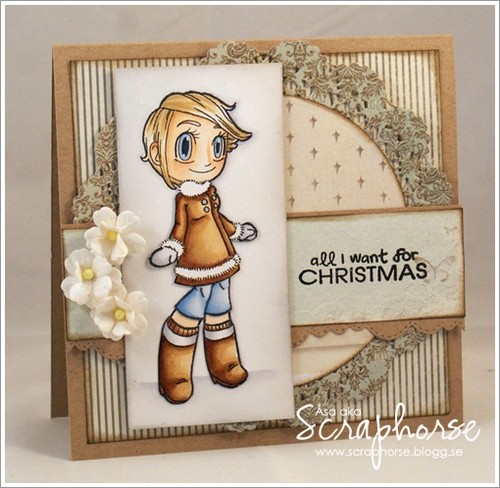
The image is colored with Copics.
Papers from Pion Design, distressed with Walnut Stain and flowers from WOC.
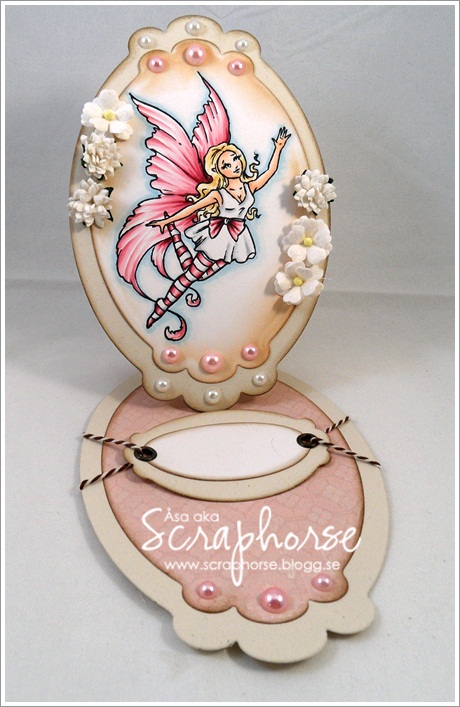
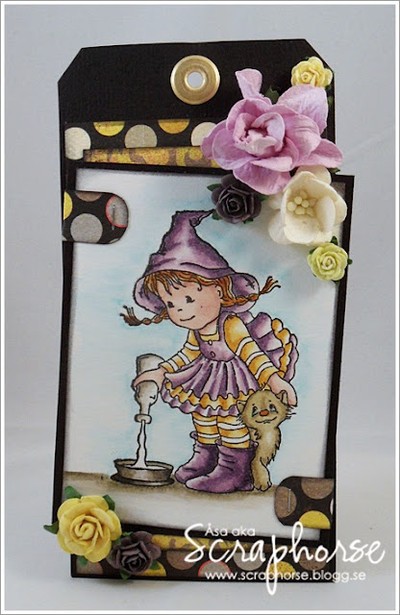
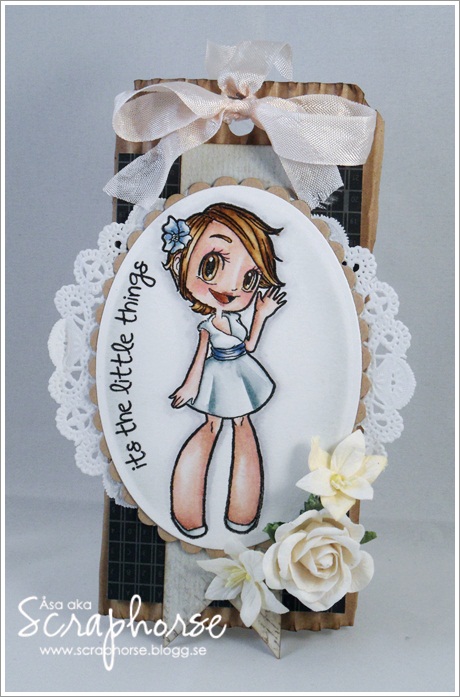
Angel Gwen for Some Odd Girl...
I´ve made a tag out of Spellbinders and papers from Pion Design.
Next new stamps at Some Odd Girl...
Tia is colored with Promarkers and Copics.
Layout för Scrap-Perra...
Tänkte så stort att jag till dagens alster skulle följa Helens fina skiss i Veckans skiss hos Scrap-Perra.
Till en början gick det bra, men någonstans på vägen spårade det ur.
Och nu vet jag inte riktigt vart jag hamnade, inte det minsta likt.
Men så är det nog ofta, och det är väl lite meningen, att vi hittar något som inspirerar, och vad det blir i slutändan är egentligen inte så viktigt!
Jag har använt papper i ljusblå-beiga färger från MME och Pion Design.
Alla kanter är distressade med Walnut Stain.
Jag började med att stämpla med Tim Holtz textstämplar och skvätta med lite Glimmer Glam innan jag fäste pappren och dekorationerna i en diagonal över sidan.
Jag har använt mig av Kaiserkrafts Rub Ons även denna gång.
Förutom texten har jag även klippt sönder en fras i flera olika små-ord som jag placerat ut lite sporadiskt.
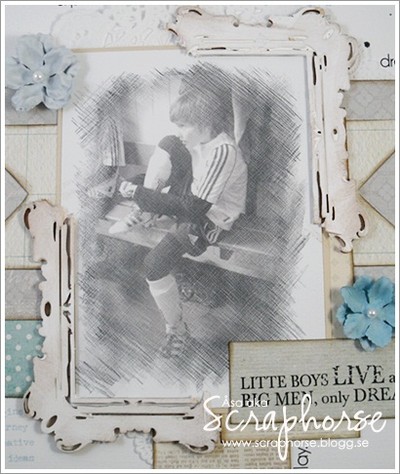
Runt bilden har jag brytit isär en trä dekoration från Kaiserkraft i två delar och sedan målat dem med Gesso och gått över med lite distress Walnut stain.
De härliga blommorna är ifrån Prima.
Glöm inte bort att Scrap-Perra är i Enköping på pysselträff i helgen.
Hoppas vi ses där!!
New release at Some Odd Girl...
Well are´nt they just the sweetest little things!?!
Pion Design at StampArtic...

Here I have used green and beige/brown colors.
The lovely image from Saturated Canary is colored with Copics and Promarkers.

For the paperbag I have used blue and beige colors on the papers.

For the last one I´ve used beige and soft pink.
The Vintage Pictures is also from the same release.
Now jump on over to the StampArtic Blog and check out all the wonderful projects!
Blog Hop with Some Odd Girl & MarkerPop...

Hello and welcome to the Holiday Hop presented by Some Odd Girl & MarkerPop! Today we are teaming up to share some amazing holiday inspiration created with Some Odd Girl's new release along with some of our favorite coloring tools from MarkerPop.com. If you are just joining us on the hop, you are going to want to start back at the beginning at the Some Odd Girl Blog so you can see why we are hopping & what amazing prizes are up for grabs!

Some Odd Girl is having an amazing Clearstamp release next week with some wonderful new holiday images!
And this wekeend we, together with MarkerPop, are giving you some sneaks on whats to come!
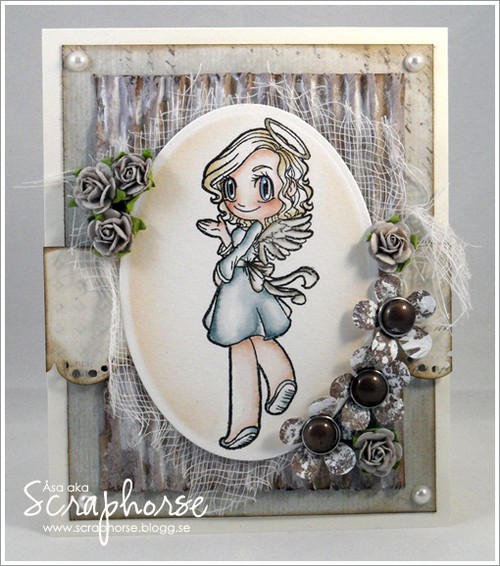
Im going a little Vintage on this one, adding lots of distress, acrylic paint, corrugated paper and cheese cloth.
Together with some lovely papers from Pion Design.
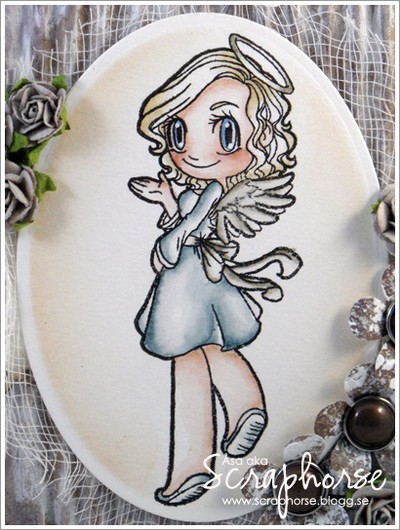
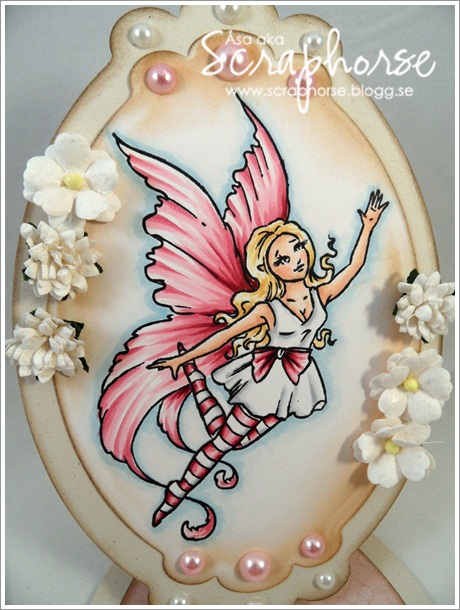
The lovely image is called Angel Gwen. Isn´t she just wonderful!!
I´ve colored her with Distress Markers to get that soft vintage touch.
Thank you for stopping by to see my creation! Be sure to visit the rest of the designers participating in this blog hop, click on the next name on the list below. Also don't forget to leave me a comment for another chance to be entered into our prize drawing. When you are done hopping, make sure to stop by the MarkerPop Blog so you can play along with our holiday hop challenge.
Treat Box Tutorial for Some Odd Girl...
Hi there Oddies! It´s my turn in the Some Odd Girl Blog today and Im going to show you a little Treat Box tutorial.

I´ve used:
12"x12" patterned paper
Cardstock
Stamp: clearstamp from Hey Kaylee
Distress ink
Adhesive tape
Jute/ribbon
Spellbinders die
Decorations/Embellishments
The image is colored with Distress Markers
Start to draw and cut out a circle on your patterned paper that is approximately 8½" wide.
Then score it with a bone folder for the dimensions as in the picture below.

Notice that my treat box is a little bit bigger than this, I´ve adjusted it to size up with the candy.

Before I glue it together I ink all the edges with Distress ink - Walnut Stain.

Then I use adhesive tape to stick it together:

Fold in the side flaps and carefully align and stick the front flap on to the side flaps.
The base for the treat box is ready and it should look like this!

I like to take some papperfrills and stuff it into the box. It makes it look a little bit more I think.
I make the paperfrills myself by taking a piece of cardstock and run it true my crimper and then cut it into thin strips.

Then I take all the strips and crunch them in my hand a bit.
Now they are ready to fill the Treat Box.
So - the only thing left is the really fun and easy part - to stick your motif on and decorate it!
Here´s the final result of my Treat Box!

So there it is! Hope you´re inspired to make you´re own Treat Box!
Prima layout hos Scrap-Perra...
Denna vecka så kommer DT-teamet ha Mask-tema hos Scrap-Perra.
Tycker alltid det är roligt när vi får speciella uppdrag, inte bara för skapandets skull, utan även för att se vad de andra tjejerna hittar på!
Jag har bestämt mig för att jobba med en av Primas underbara masker.
Det finns många sätt att jobba med masker, kolla gärna in någon av Camillas superbra videoklipp, där kan Ni se hur lätt man kan använda dem med olika medium.
Jag hade en ganska klar bild på hur jag ville jobba med min och jag kommer använda mig av Modeling Paste.
Jag börjar visa det färdiga resultatet på min layout:

Jag tänkte visa några enkla steg-för-steg bilder hur jag gått till väga.

Jag började med att lägga masken där jag vill ha den och markera ut kanterna med små blyertsmärken.
Sedan har jag stämplat med olika clearstamps utanför dessa.
Här har jag först stämplat med Distress dyna Victorian Velvet och sedan stämplat med rosa akrylfärg ovanpå detta. Det ger härlig struktur och dimension.

Sedan la jag på masken igen och stryker ut pastan med hjälp av en spatel/målarkniv, innan jag tar bort den igen.

Här kan Ni se vilken härlig dimension det ger till layouten!
Den här tekniken fungerar väldigt bra om man vill göra sk. One-layer-layouts.
Men jag känner för att dekorera upp den lite, för att få en romantisk känsla som passar bra med fotografierna.

Här kommer en närbild på dessa.
Jag har nästan uteslutande använt mig av dekorationer, pärlor och blommor från Prima.
Fjärilarna och texten är Rubons från Kaierkraft.
Här är en närbild på pastan.
Hoppas Ni kommer finna mycket inspiration under denna vecka.
September challenge...
Shouldn´t be so hard - love tags, in any way or size!
Here comes mine:
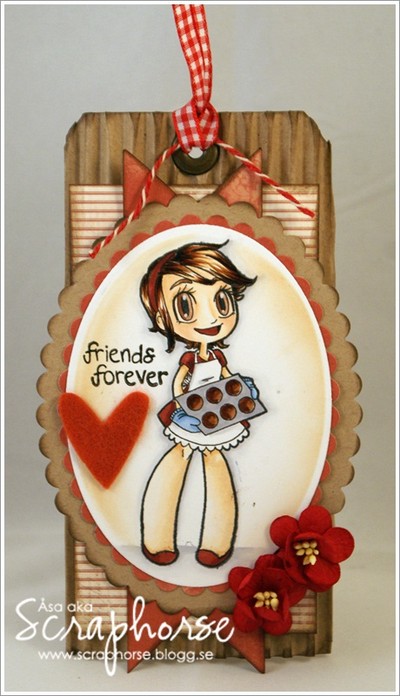
The image is from Some Odd Girl and is colored with Distress Markers.
It doesn´t have to be a whole tag. You can do anything, as long at is has a tag on it.
For this challenge we have a fantastisc prize from Pion Design.
New challenge at Some Odd Girl...

The image is colored with Distress Markers.
I´ve used one of the new clearstamps from Preppy Pups.
Isn´t he the cutest ever!?
The sentiments are from another clearstamp set.
Papers from October Afternoon.
Hurry on over and check out the teams amazing creations!
See you tomorrow again!
